¶ Setting Up the 3D Printer
Plate Alignment
Changing Filament
¶ Export file from Onshape
If you dont need to export the file you can go ahead to File Structure
Once you have Onshape Open. Go to the assembly or part studio. The process is the same for either one.
Locate part within the 3D viewer. Right click > Press Export
screen_recording_2025-09-23_003651.mp4
Export Dialog and File Name
- When we name our files. We add what material we will use, what color, and how many we are going to print.
For Example)Part Studio 1 - Part 1 - PETG Black - 1PC - Then we need to select
STLas the file type - Press
Export
screen_recording_2025-09-23_004242.mp4
File Structure
Depending on what the file is for is where we should save it. If its for personal use, then just keep it in downloads. Otherwise files must be saved in the Robot Files in Nextcloud.
To locate or save a part follow these steps.
- Open File Explorer
- Click
Nextcloud, which should be on the left dock. - Once your in the Nextcloud drive, Go to
Robot Files. - Under Robot Files, Locate the Year Robot Files.
For Example)2025 Robot Files, or2025 FTC Robot Files - Save Or Open your file that's located in
3D PrinterFolder
¶ Using Bambu Studio
The slicer we use is called Bambu Studio, which directly connects to our 3D printer over ethernet.
A slicer is a software that takes a 3D model and programs a paths and when it should extrude material.
Connect Printer
First we need to connect to our printer. Do this by selecting Device, inbetween Preview and Project.
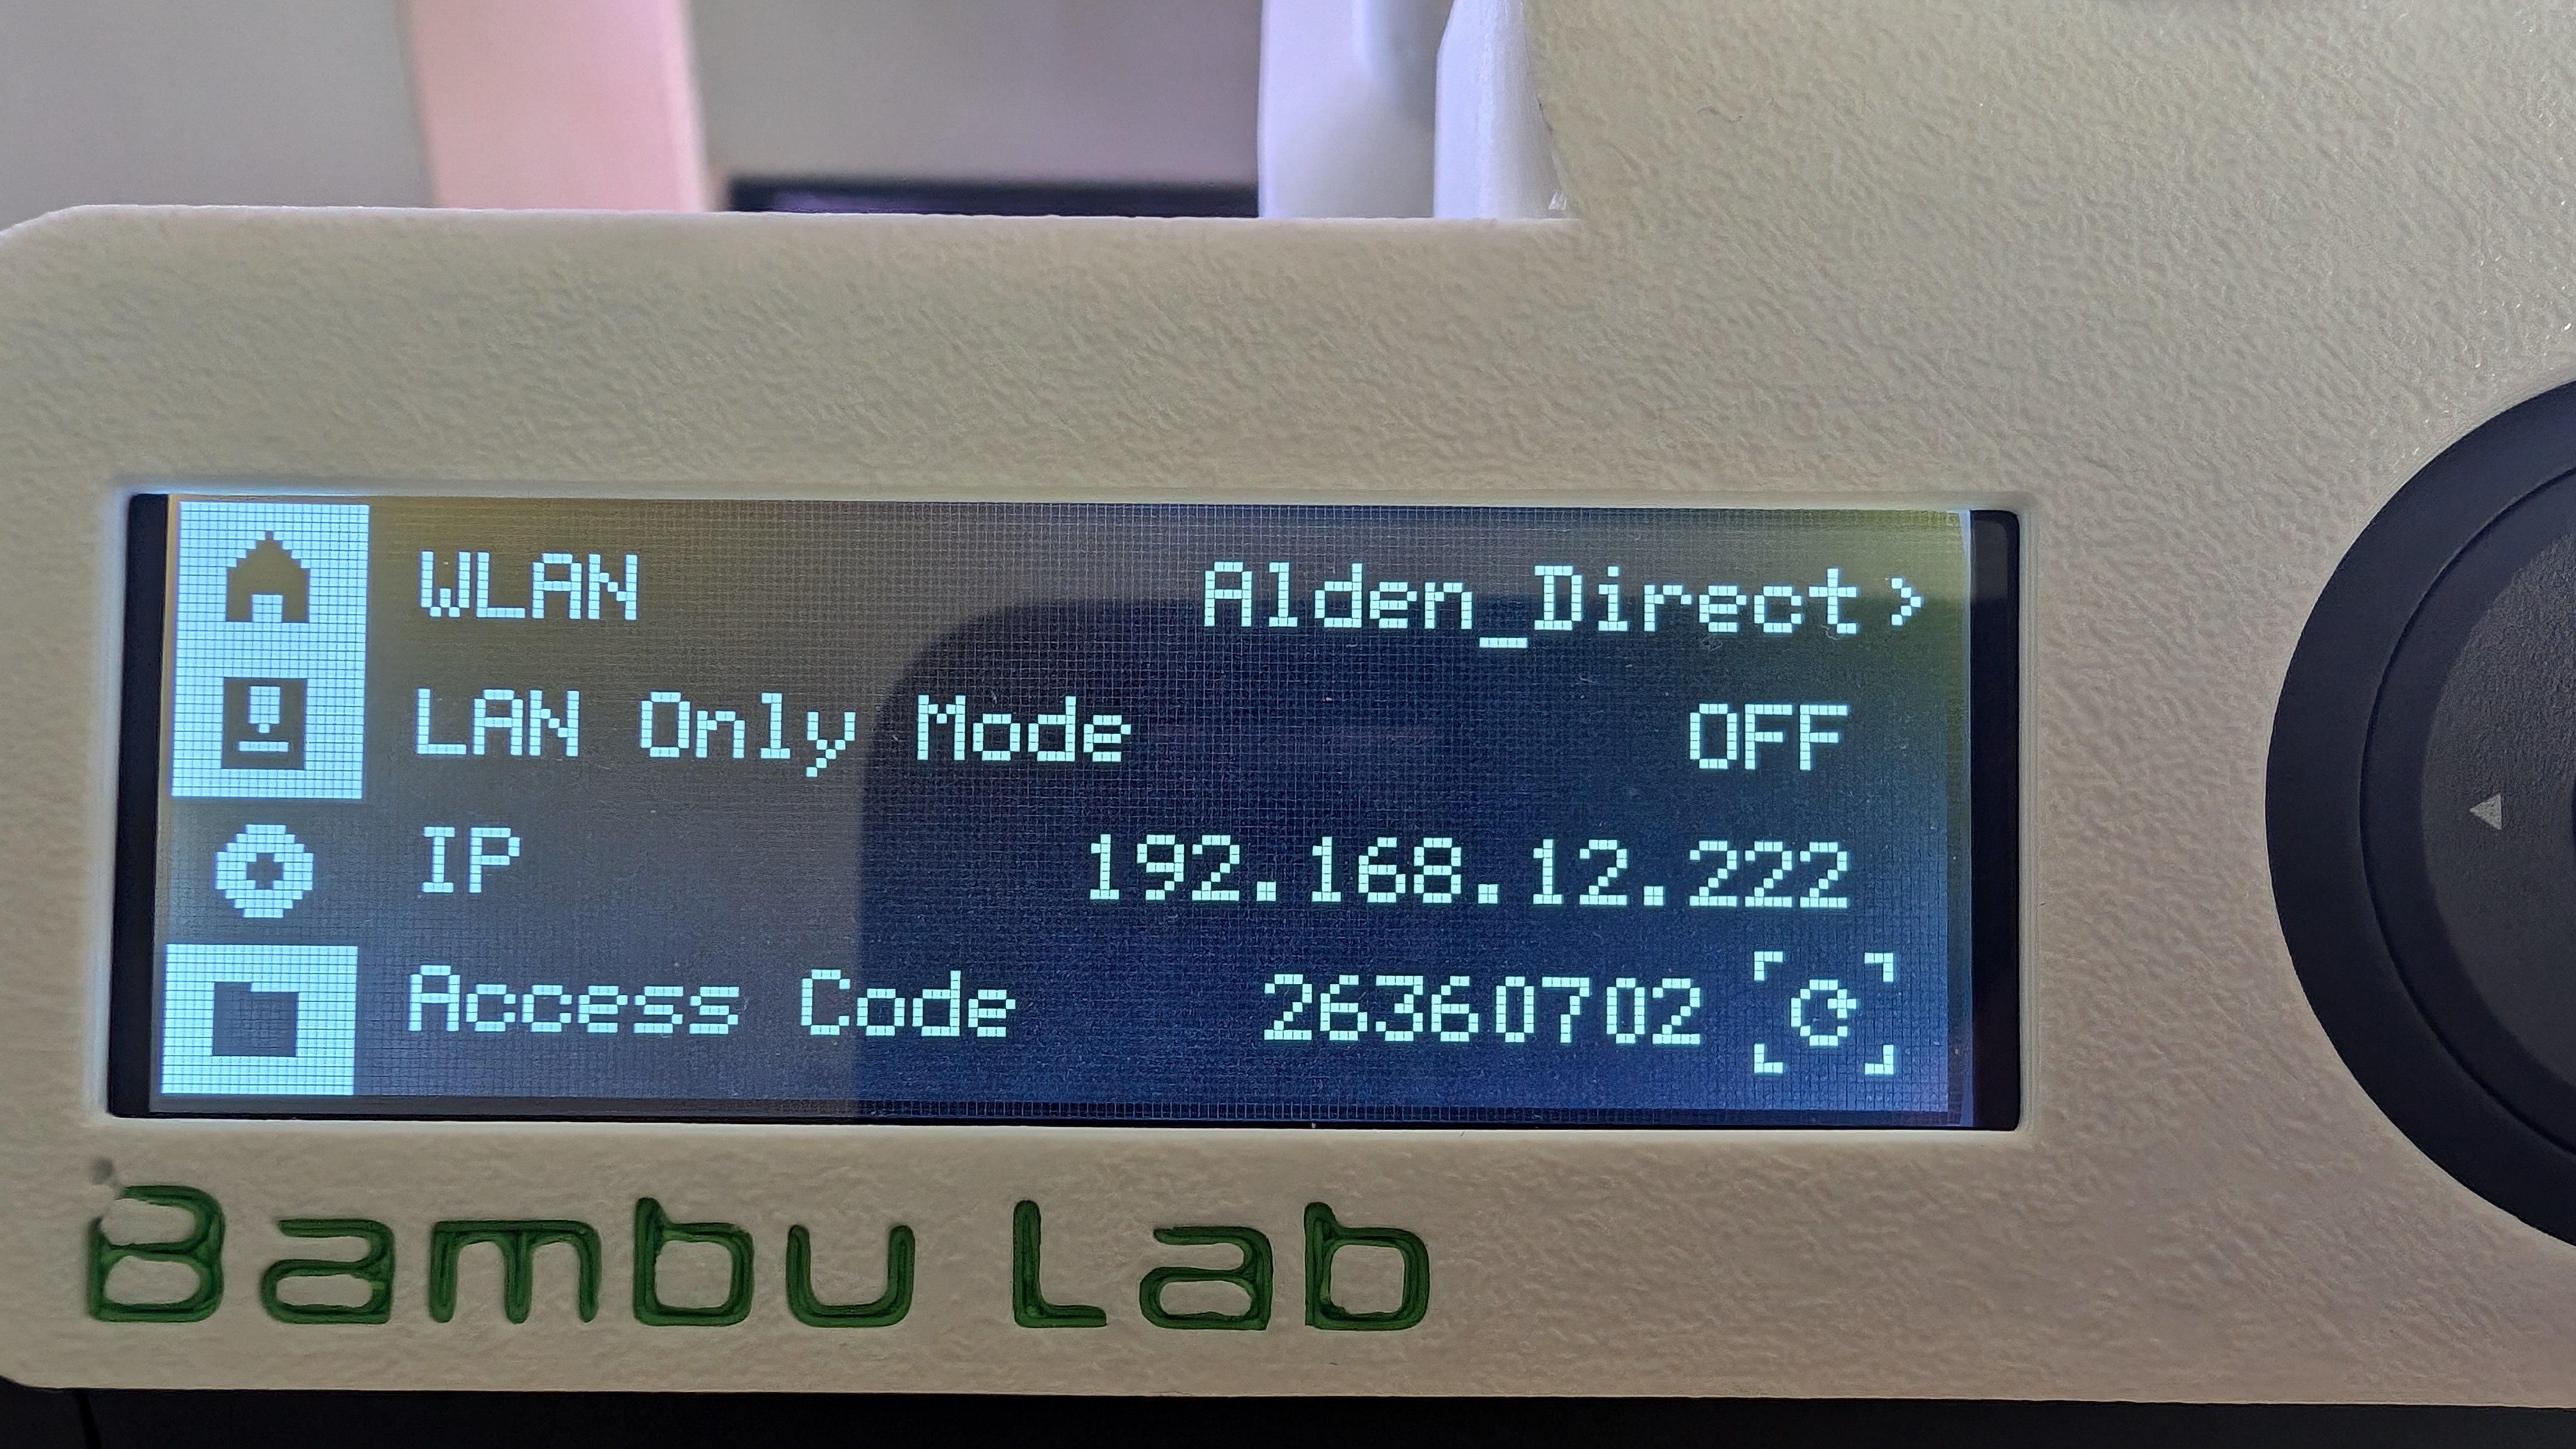
At the left hand side and you should see our printer name placeholder. If you dont and it says Connect Printer then the printer could be off. Occasionally you will need to retype in the Access Code to reconnect. This is located on the printer menu under Settings (looks like a cirle) > Access Code (Which is an 8 diget code).
By going to the device screen, the printer has been opened. What this did, was allow us to update our matierals and what printer we are using in the Prepare tab.
Prepare Model
In the tab section on top, go to Prepare. This is the space where we open our model and posistion it on the 3D printer bed.
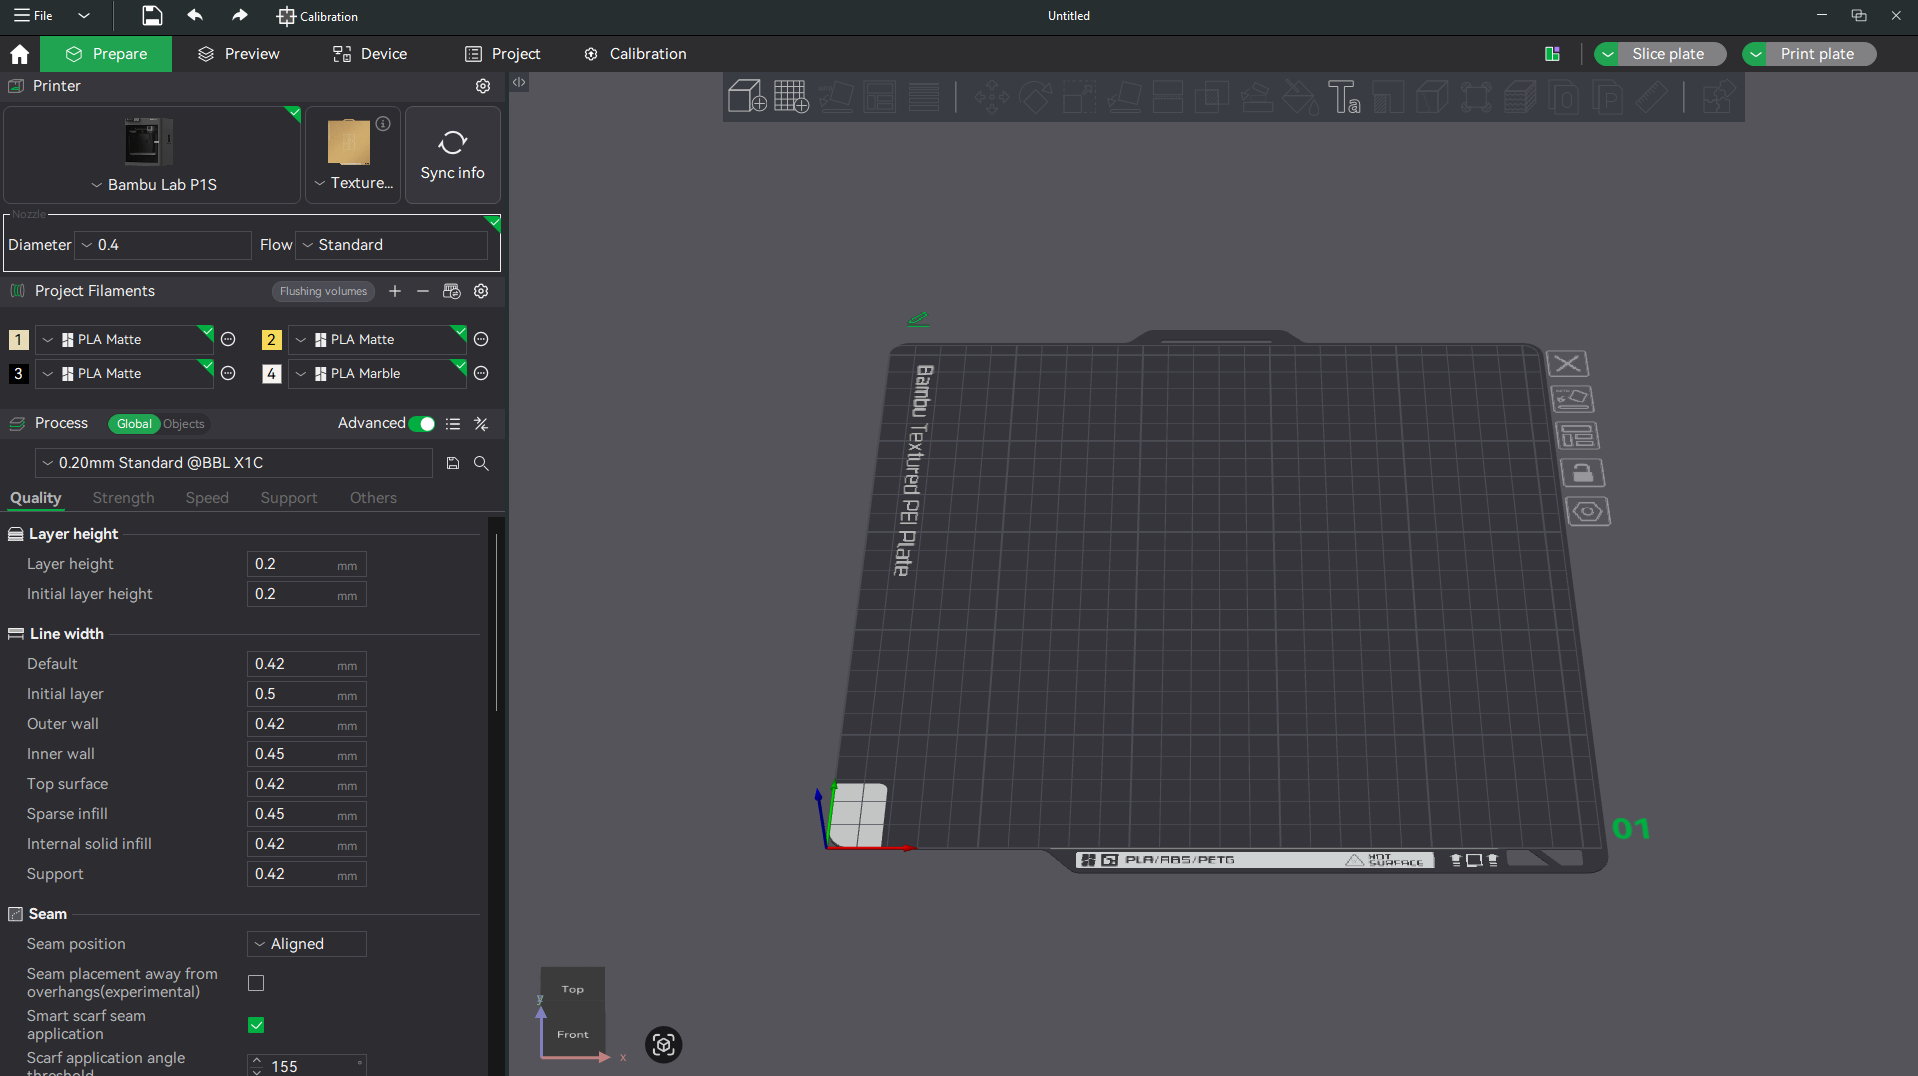
First thing we should always do is press Sync Info. We want to make sure our printer and material is up to date. When prompted, press Continue to Sync Filaments.
Lets go ahead and import our model. Press the Cube with the Plus icon and you will see file dialog box. Follow the File Structure instructions to get to the robot files.
Once you open your file, it may come load at a strange angle. We will use a tool called Auto Orient, which is the Square with a line on the bottom and it says auto. This should fix most models.
screen_recording_2025-09-23_015602.mp4
Any time you want to do anything with your model, make sure you have it selected first.
Clone
When we want to print more than one of the same model. We use a tool called Clone. First select the part, right click and press Clone, or you can use the shortcut Ctrl-K. This will ask you how many copies you want. If you make to many on accident, just select and press delete.
screen_recording_2025-09-23_021758.mp4
Rotation
Rotation will help orient mutiple parts on the bed. While your part is selected. Use the top tool menu, select the icon with a box and a rotation arrow. This will come up with a small dialog where you can use degrees (°) to change the x, y, or z orientation.
screen_recording_2025-09-23_021938.mp4
Changing Material
Selecting a material is critical when it comes to using the bambu printer. We use a system called an AMS (Automatic Material System) to change the materials for us. Selecting a material also sets our printer to use the correct meterial settings.
screen_recording_2025-09-23_022145.mp4
Using Supports
When we design parts, we try to use as little support as possible. Although this is something that can't be avoided all the time. If you have a part with an angle less than 30° then it will require support. There are two types of support, tree support or normal. Tree support can be great to reduce material scarring. Normal is a strong and well rounded way to support.
In order to have support, navigate to the support tab in the Global Processes Settings. This is located on the left hand side, near the center of the screen. You will see a check box that says Enable Support, click this check box, and select the stype of support you want (normal will be default).
screen_recording_2025-09-23_035038.mp4
If you want to learn more about the features, we suggest looking at the Bambu Labs Wiki.
¶ Printing
Preview
When we are ready to print, we need to select the Preview tab located at the top of the screen.
A few important things about this screen. Its a good time to check to see how the 3D printer will path around. Use the right hand slider to view diffrent layers in the print.
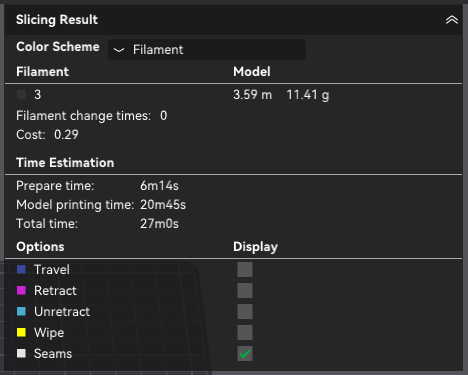
The next section to look at is the Slicing Result. The default color scheme is Line Type. Personally I like to use Filament, as it shows more about the print than colors of the print. A few main things to look at in this screen, the time it will take to print called Total Time, and the amount of material the print will use (in grams).
Sending the Print
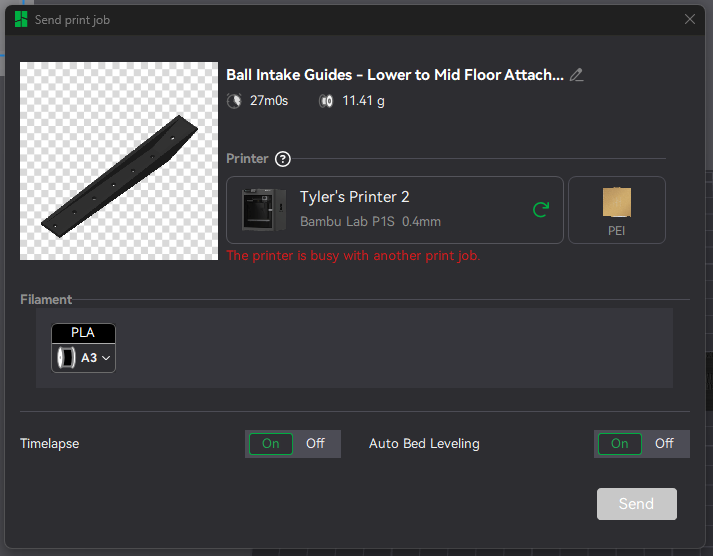
When you are ready, click Print Plate at the top right corner of the screen. This will bring a dialog box up asking you to select your printer, and confirm what Filament you are using. Once you finished checking, click send. This will bring you to the device tab once it finishes.
While Printing
We always want to check up on prints as they are progressing. We want to look for signs of failure, which include the print not sticking to the bed, filament not extruding correctly, etc. 3D printing is amazing because it is very self-sufficient.
¶ Post Process
When the printer is finished, we need to look for any defects that will cause the part to be unusable. Remove any support material from the part, and clear the build plate of any material that is stuck. This includes the line at the very front of the build plate.